If you’re having serious thoughts about adding a laptop to your stage setup, here’s an inexpensive way to make a professional-looking laptop platform that is low profile, multi-purpose and not at all difficult to construct.
The basic platform is made of 3/16-inch thick Lexan, which can be purchased at Home Depot or any plastics supply house. This particular platform measures 24 inches wide, 8 inches high and 9 inches deep. The bottom shelf measures 4.5 x 24 inches. This particular platform was constructed from a single sheet of Lexan, however, it can also be made from 1/8-inch thick aluminum plate, which would be considerably stronger and weigh about the same. Additionally, unlike Lexan, aluminum plate can be easily bent to the desired shape and dimensions.
The platform essentially is a multi-purpose box that holds all of your accessory’s power supplies, surge protector, and cabling to those devices, while at the same time, covers all of the jacks, plugs and switches on the back of your keyboard, hiding that unsightly wiring maze that normally is visible to the audience. The only cables your audience will now see are the power cord, speaker cable(s) and footswitch. All of the others are hidden behind the box.
If you have the electronic skills necessary, construct custom cables that are the precise length needed to connect to the auxiliary devices. Power cables can be shortened and new 110/220-volt plugs attached, and wherever possible, lightweight instrument cables can be replaced by heavy-duty, shielded cables with soldered connections and strain relief sleeves to prevent chafing of insulation at connectors.
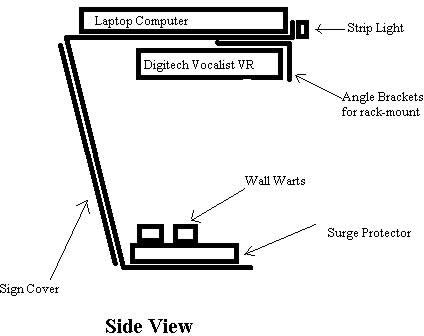 Looking
at a side view of this box you can see where the components were located.
Looking
at a side view of this box you can see where the components were located.
On the front of the platform, a 20-inch strip light purchased at Home Depot for $14 is used to illuminate the top of the keyboard with a soft light. This is a great asset for those performing in dimly lit situations such as night clubs, restaurants and similar venues. An inline switch allows you to turn the light off when not needed
The platform’s front view provides a bit more insight on where you can place the various components.
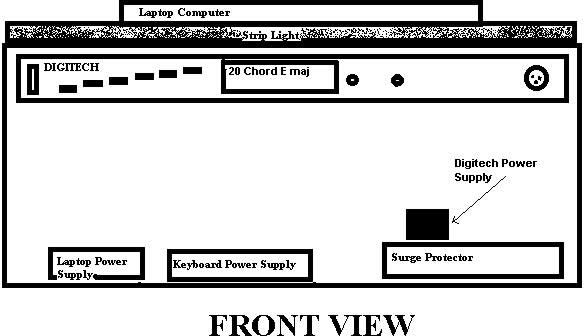
When the platform is positioned on two-tier keyboard stand’s upper arms, the arms can be adjusted so the top of the strip light is a mere 3 inches above the keyboard. As you can see by the drawing, this allows you to readily access the Digitech Vocalist VR’s controls, see the display, yet still maintain a low profile of the overall setup, which can also be seen here. The surge protector, keyboard power supply and laptop power supply are all held in place with Industrial Strength Velcro. The Digitech Vocalist VR is held in place with the aid of a pair of 4-inch, aluminum, “L” brackets that were modified to create rack-panel supports. The bracket’s vertical arms were cut with a hacksaw to the length of the Digitech’s height, then drilled and tapped to accommodate the size 10-32 machine screws supplied for mounting.
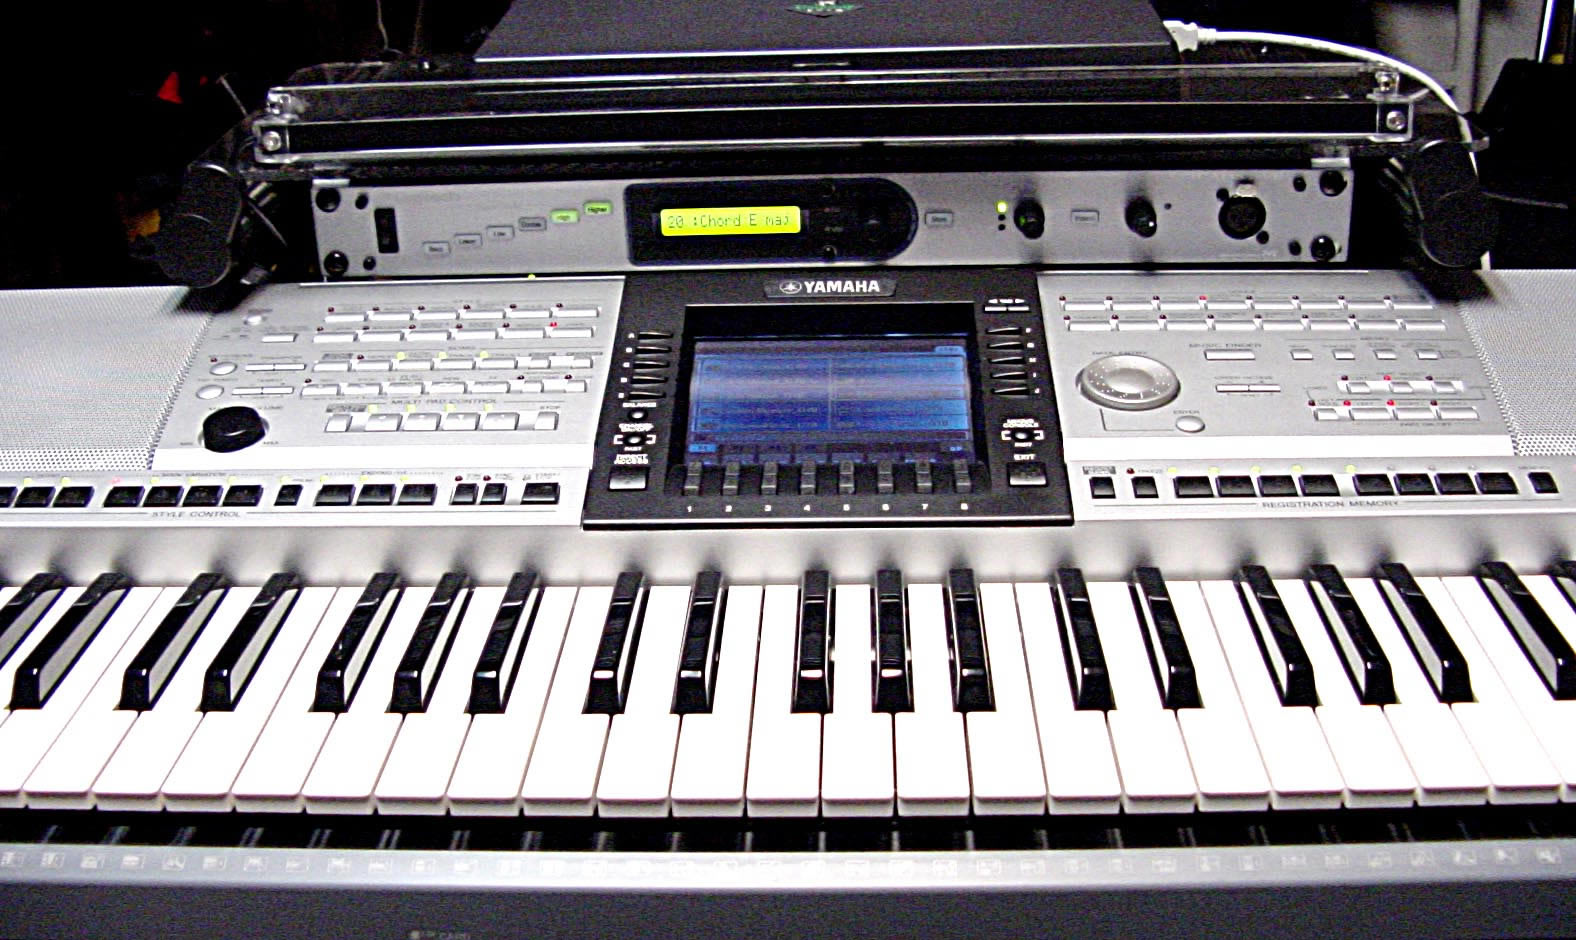
Click on image for larger view.
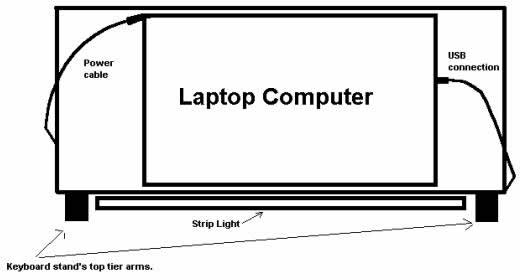
A top view of the platform reveals the position of the keyboard stand’s support arms, and position of the laptop computer in relation to the main support. As you can see, both the laptop’s power and USB cables are routed cleanly to connections beneath the platform, out of the audience’s view. Unfortunately, most USB 2.0-A to USB 2.0-B cables are white or clear, which makes them a bit more visible.
The face of the box becomes a convenient location to display your band’s name, and a professional looking sign can easily be made using programs such as Paintbrush, Print Shop, and many others. The sign is covered with a single sheet of clear, lightweight Lexan that is pop-riveted in place. The aluminum rivet heads can be colored with a permanent marking pen. The sign can also be illuminated by installing a second strip light directly above the sign.
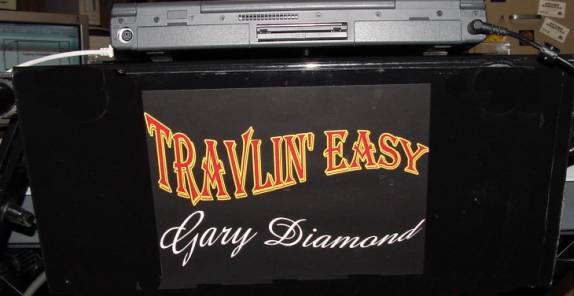
The above sign was made using Print Shop 12 and took just 5 minutes to make. It is held in place with 4 aluminum pop-rivets, and the heads were colored with a black, permanent marking pen to conceal them.
The entire platform fits in an inexpensive duffel bag that was purchased from Walmart for $12. This provides sufficient room for the power and speaker cables, protection from scratches and makes the platform easy to transport. The total cost of materials, including strip light and surge protector was just under $50. Construction time was approximately two hours and as you can readily see, the project was well worth the time and effort.
Gary Diamond
This page updated on March 22, 2019 .