Turn Your Keyboard On
OK, back to turning the keyboard on. Push the POWER button in to turn on the keyboard. When you are ready to turn off the keyboard, push the POWER button once more. The first time you turn on the keyboard, it starts with all the original factory settings. Some of the features of this keyboard, like the styles and voices, are internal "presets" that are permanently stored in the hardware of the system. You can not delete them or alter them in any way. However, your keyboard also includes internal memory where changes you make in keyboard settings can be stored. The keyboard can "remember" those settings from session to session. When you turn the keyboard on again, your personal settings remain just the way they were when you turned the keyboard off.
Since you will be able to change a lot of the settings in the keyboard, you may push some keys that cause your keyboard to work in an unexpected way. That is, you made some change you did not intend to make and, the next time you turn your keyboard on, that changed state may still be in effect. Fortunately, no matter what changes you make, you can always restore your keyboard to the original factory settings. Looking at the black and white keys on your keyboard, simply hold down the far right white key (the highest "C") on the keyboard while you turn on the power to your keyboard. This will reset your keyboard back to the original factory settings. So, no need to worry about pushing any buttons on your keyboard - you can't break anything and you can always get back to the original factory setting.
The steps outlined below show how to access the demos on the new PSR-SX900/700 and Genos models. Accessing demos on the Tyros models or one of the earlier PSR-S or PSR models is explained in the next section below.
The PSR-SX900 and Genos Demos
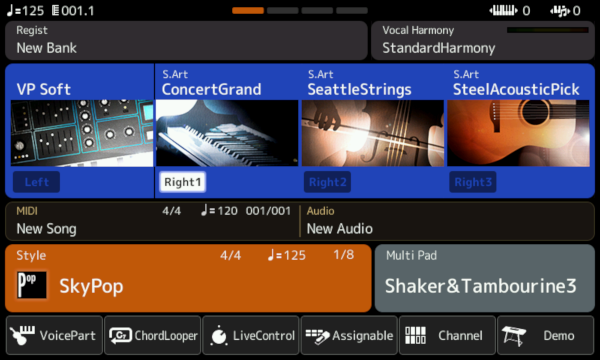
From the HOME display on the PSR-SX900, notices the bottom row of options. There are six buttons here and the last one is a "Demo" button. Touch the Demo button.
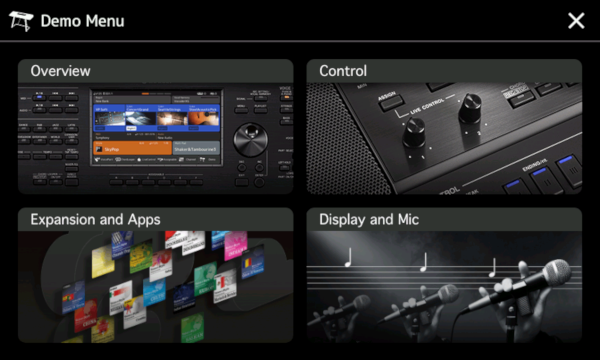
A new "Demo Menu" screen appears. There are four different demos. Touch the screen to launch any of the four demos. You will hear what your new keyboard can do as well as see some of the features of your keyboard highlighted as the demo plays. To close the demos and return to the main screen, touch the "X" in the upper right-hand corner.
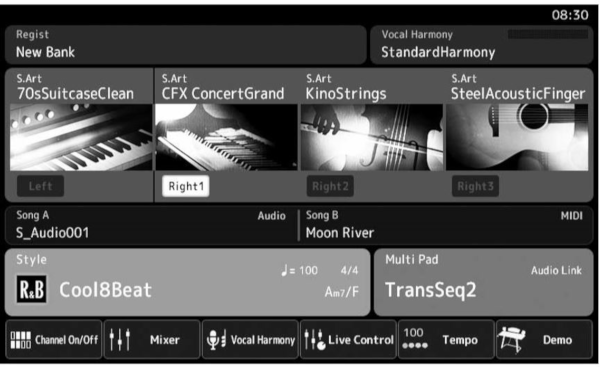
Below is the Genos HOME display screen. You will see that it is very similar to the HOME screen of the PSR-SX models. Here, too, the "Demo" button is shown in the bottom right-hand corner.
Those six buttons shown on the HOME screen are "assignable" buttons. That means each user can reset those buttons to call up whatever functional screen they want. So, your keyboard may not show "Demo" in that last button. In this case, press the [Menu] button on the keyboard and you will see the "Demo" option as one of the choices on the first Menu screen.
Now that you have heard and seen the demos, you can skip ahead to the next lesson on Preset Songs.
Navigating the PSR/Tyros MAIN Screen
We'll talk about accessing the Demos in your keyboard in this lesson. However, interacting with the demos, like almost everything you do on your keyboard, will be through the display screen located right in the center of the top panel and the associated control buttons for that screen. So, let's take a few minutes to see how that screen and the buttons work.
The Tyros3 display screen is shown below. Note that this screen can be lifted up and adjusted to an angle that suits the player's preferences. Screens on the mid-range keyboards are set permanently into the top panel. The mid-range keyboard screen includes an LCD adjustment control (usually on the back panel) that allows you to adjust the brightness and clarity of the screen.
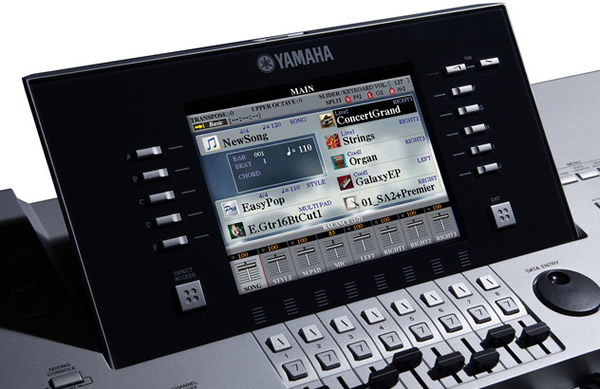
All of the screens have a consistent set of control buttons that allow the user to select options shown on that screen. On the initial screen shown when you start up, the screen title is at the top of the display screen (labeled MAIN in the photo shown here) and there is an informational line below that. The central part of the screen resembles a table with two columns and five rows. The five buttons on the left and right side of the screen are used to select particular rows. The five buttons on the left are labeled A, B, C, D, and E. The five buttons on the right are labeled F, G, H, I, and J. In the above screen, the F button has been pressed and the top row, right side is highlighted (white letters on a black background). This happens to be the 1st right-hand voice (the ConcertGrand piano).
Below the 5 x 2 table display are, usually, two narrower rows with eight cells. In the main screen, both of these rows are used to show 8 "slider" controls that control the volume of various voices. Below the screen are two rows of 8 buttons. The exact function of these buttons depends on the screen options being shown. In the case of the MAIN screen, the top button is used to move the 8 slider buttons up (increases volume) while the bottom button moves the slider controls down (decreases volume). Note that the Tyros3 shown in the photo also has slider buttons on the keyboard itself but these are not available on all Yamaha keyboards.
On the left side of that top "informational" row are two additional buttons marked "TAB". Many option screens will show several "tabs" at the top of the screen and you can move from one tab to the next by using the TAB NEXT or TAB PREV buttons. (We'll see an example of that in the Voices lesson.) Finally, on the bottom right of the main screen controls, notice the button marked "EXIT". As you make selections on the display screen, you may be "drilling" down into additional optional screens. The "EXIT" button takes you back to the previous screen. No matter where you are on in the universe of display screens, repeated pushing of the "EXIT" button will always get you back to the very top MAIN screen.
We'll talk more about navigating that main screen more in the next lesson. I wanted to mention these main control buttons here, however, because even if you are just using the "demos" included in the keyboard, you will control the display of those demos by using the main navigational buttons.
The Tyros3 screen is very colorful and does look very nice, but all the keyboard screens have similar components and similar button configurations. These all work in the same way.
Step 3 - Push the DEMO Button
All of the models have a DEMO button that will launch music, and display screens, to show off what your keyboard will do. The detailed description below applies to the Tyros3 Demos. On the Tyros5, the DEMO button launches a series of screens with music illustrating features of the Tyros5, but there are no user options shown. To exit that demo, simply press the main EXIT button to return to the MAIN screen. By the way, the DEMO button on the Tyros5 is located on the far right side of the keyboard at the top of all the panel buttons.
The remaining discussion below applies only to the Demo feature on the Tyros3.
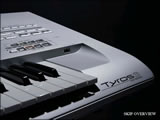
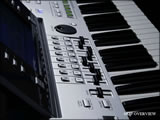
When you push this button on the Tyros3, the "Overview" will start playing and will cycle through a number of pictures while the music plays. The pictures shown here are only the first few screens shown on the Tyros3. There are many more. Other keyboards will have different pictures and text.
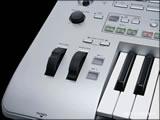
While the music is playing, this would be a good time to try out that MASTER VOLUME knob. The Master Volume knob is on the left side of the keyboard. If you don't hear any music, make sure that this knob is not turned all the way to MIN. Turn the volume knob up (clockwise) anywhere from 1/4 to 1/2 of the way to MAX. This "Master Volume" controls the overall volume of the keyboard. As you turn it clockwise, every sound coming out of your keyboard will be louder. Similarly, turning it to the left will diminish the overall volume. You'll learn later that other controls will actually let you control individual sounds (think of voices or instruments) relative to other sounds coming from the keyboard. If you have a Tyros model with external speakers, you may have additional volume controls.
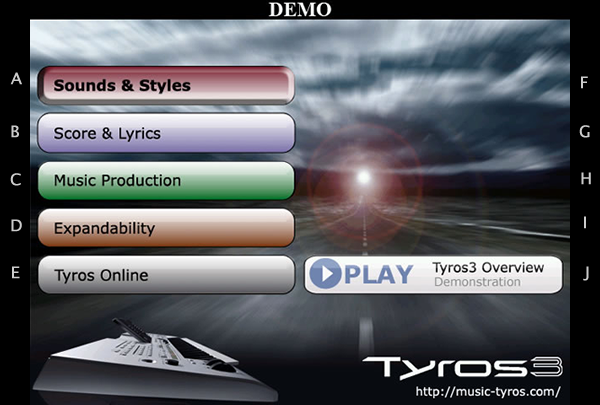
While the Demo Overview is playing on the Tyros3, each display screen has a prompt "SKIP OVERVIEW" shown in the lower right-hand corner of the screen. You use that "option" to stop the overview music and screens and continue on with the demonstration. How do you select the SKIP OVERVIEW? By pressing the button(s) below the screen right under the "SKIP OVERVIEW" prompt. In this case that would be buttons #7 or #8. This Overview will never disappear. When the song ends, it just starts playing again. You need to exit the Overview to get to the main Demo screen (shown below, I've added letters on the left and right to represent the control buttons).
Step 4 - Explore the Demo Screens
Remember, you have to press either button #7 or #8 to Exit the Overview. If you press the large "EXIT" button, you will exit the demos and return to the MAIN screen.
There are five main sections in the Tyros3 DEMO. They are indicated by the button-looking options in the left column. For comparison, the figure below shows the DEMO screen for the PSR-3000, which has slightly different options.
If this were a web page, you would click on any of those options to go to that page. On your keyboard, however, you have no mouse control, so you use the [A B C D E] option buttons on the left side of the screen. If you want a demonstration of the "Sounds and Styles" selection on the Tyros3, press the [A] button.
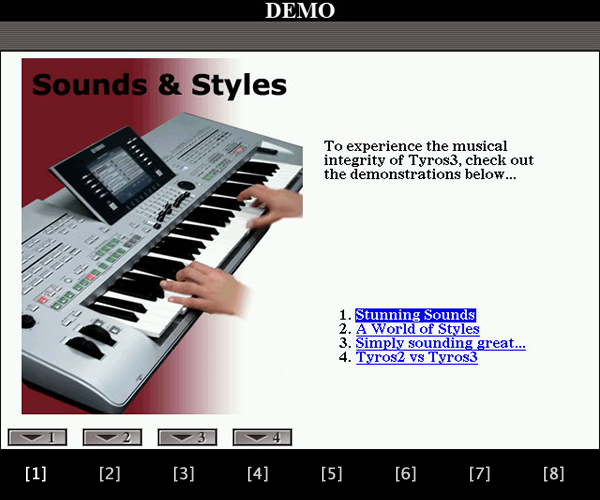
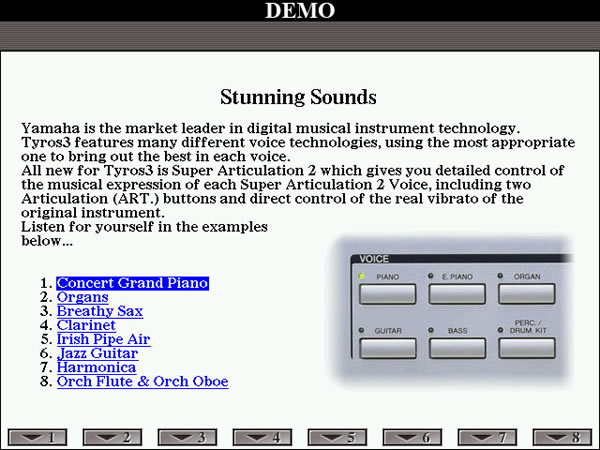
This opens up a display screen for "Sounds & Styles." However, you don't hear any sounds and styles yet. But you are presented with a sub-menu with four options. You also see four simulated buttons on the bottom left side of the display screen corresponding to the four options presented. To go to the "Stunning Sounds" screen, press either the top or bottom #1 button below the display screen. That brings up another sub-menu screen with 8 examples for you to try out.
The sub-menu for Stunning Sounds is shown below. It gives you a choice of 8 different voices to listen to. It also shows you a picture of the VOICE category buttons. We'll see how to use these in upcoming lessons to select the voice you want to play. To hear any of these "stunning sounds," press the corresponding numbered button for the option you want. Yet another display screen will show and, this time, you'll hear a song played featuring the voice you selected. There are no more options on the voice screen. When the songs stops playing, you will be automatically returned to the "Stunning Sounds" display screen where you can select another voice. Alternatively, you could push the "EXIT" button to immediately return to the "Stunning Sounds" display screen. Pressing "EXIT" here would take you back to the "Sounds & Styles" screen. Pressing "EXIT" again would take you back to the original demo menu screen.
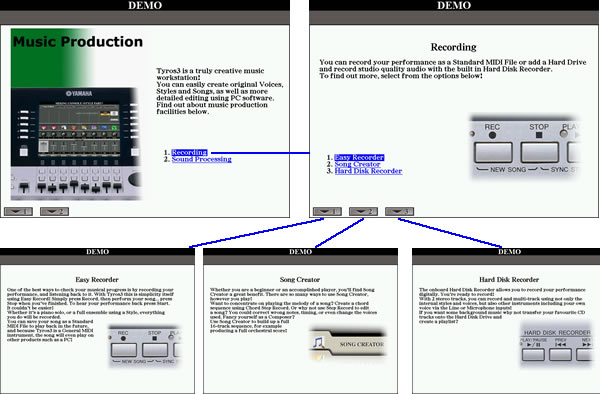
I'll let you explore the sounds and styles to see what is there. The Demo screens also cover, very briefly, some of the features in your new keyboard. For example, if you select the option "Music Production" from the top demo menu, you will learn a little about the recording capabilities of your keyboard, which including "Recording" and "Sound Processing." The "Recording" screen will take you to three additional screens: "Easy Recorder", "Song Creator", and "Hard Disk Recorder." You'll hear additional musical examples as you explore these screens, but you won't learn much about actually utilizing any of these features. Fortunately, the lessons provided at the PSR Tutorial will cover most of these topics in some detail.
You could work through all these demo screens and read the information provided there. But, many folks may prefer to have someone simply show them what the keyboard can do. If so, feel free to jump to the Demos tab where you can see some videos of the Yamaha "professionals" showing off what your keyboard can do. There are also videos there for the most recent Yamaha arranger keyboards in case you are thinking of upgrading and want to see what a newer model can do.
Of course, you do not have to rely on videos to see what your keyboard can do or hear how it sounds. Instead of watching a demo of somebody playing a song, you can play a song yourself on your keyboard. What's that? You're not quite ready to play your own songs just yet? No problem! Your keyboard comes with a number of built-in songs and you can immediately try them out. We'll show you how in the next lesson.
This page updated on February 15, 2024 .